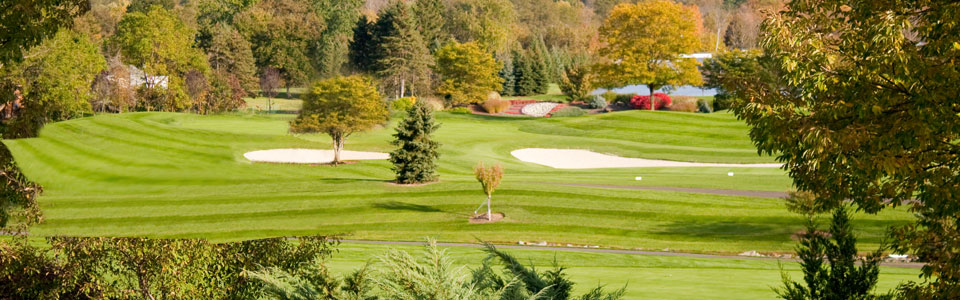
.
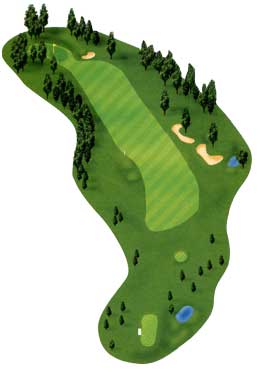
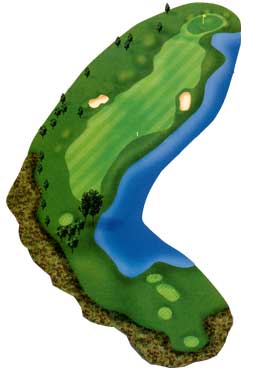
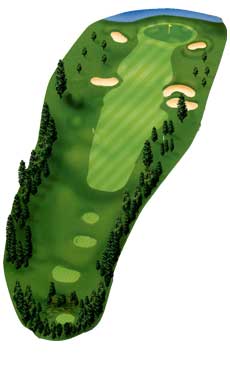
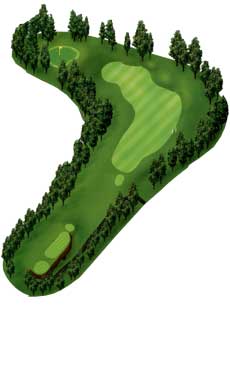
Par 4
Blue 357
White 339
Gold 322
Red 281
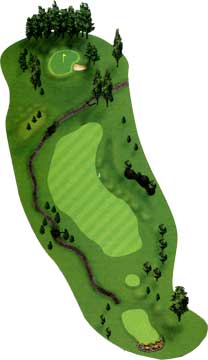
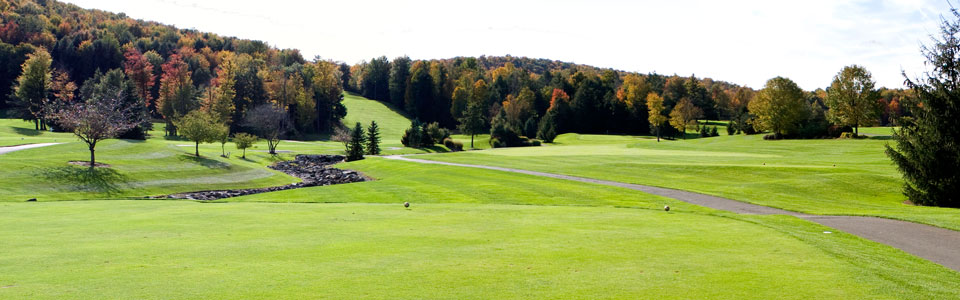
The ideal tee shot is placed on the left side of the fairway guarded by the creek the entire way. The approach shot is played to an elevated green protected on the right by a bunker.
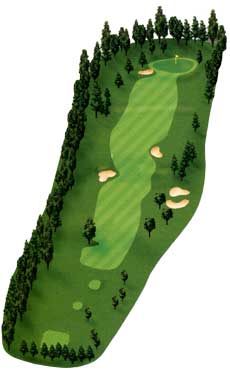
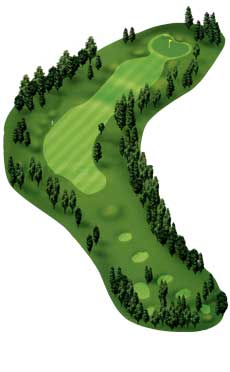
Par 3
Blue 190
White 164
Gold 148
Red 109
The medium-to-long iron tee shot is played to a beautifully landscaped hole. The two-tiered green has many tough pin placements and is protected by two bunkers and thick rough making for a difficult up and down if you miss the green.
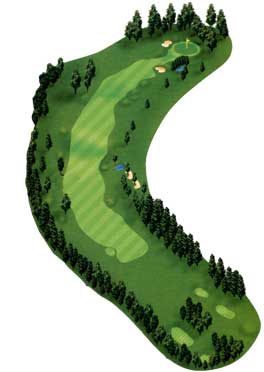
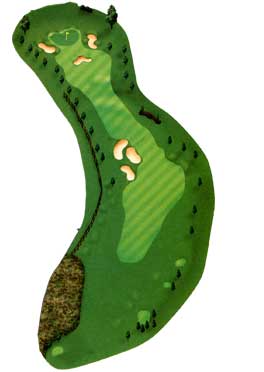
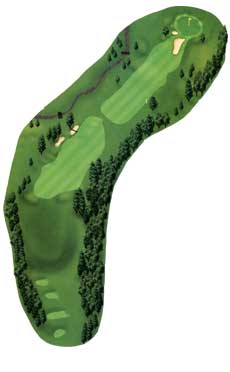
Par 4
Blue 345
White 330
Gold 280
Red 220
This short hole requires an accurate tee shot from a scenic island tee. The tee shot must avoid trees on both sides and large fairway bunker, leaving yourself a short iron approach to an elevated green.
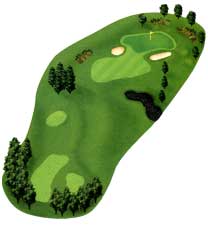
Par 4
Blue 394
White 367
Gold 360
Red 289

A long dogleg right requires a tee shot left to right to a slightly elevated fairway. The approach shot is a long-to-medium iron played to a large green, it must be short to avoid a very difficult up and down.
Par 4
Blue 372
White 356
Gold 341
Red 277
The uphill tee shot on this hole must clear the crest of the hill to have a good look at the green. Woods on the left and the right make a tee shot into the fairway a must. The approach shot is played to a very deep green guarded by steep banks on the left and the right and a bunker front right.
Par 5
Blue 612
White 570
Gold 517
Red 414
A monster par 5 with out of bounds on the left and trees on the right. A well placed tee shot on this dogleg right will leave you the decision to lay-up or go for the green in two. Few players can reach the green in two, so the lay-up shot should be played to the fairway, leaving a short third iron into the green, avoiding the green side bunker on the left.
Par 3
Blue 249
White 180
Gold 170
Red 150
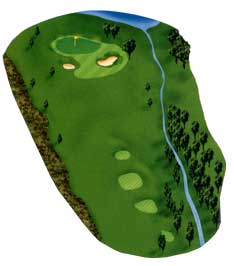
This par 3 requires a long iron downhill tee shot to the largest green on the course. The hole is protected by bunkers in front and a steep bank to the right, which leads straight down to the lake.
Par 3
Blue 175
White 168
Gold 123
Red ?
The tee shot is played from an elevated tee across a ravine to a green angle that makes distance control a premium. Wind direction and strength can really affect the shot.
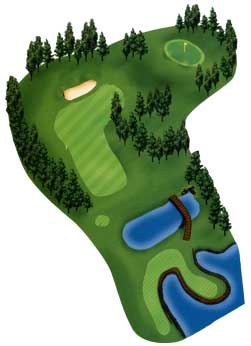
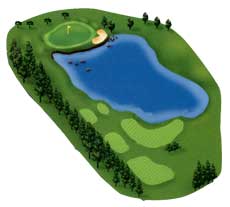
Par 4
Blue 420
White 360
Gold 343
Red 300
This hole has it all. A picturesque view from the tee is only exceeded by the difficulty of the tee shot. The tee shot is carried over the lake to the fairway, protected by large bunkers on both sides. The approach shot is played to a contoured green protected on the right by the lake. Wind direction is key to how this great golf hole plays.
Par 5
Blue 535
White 462
Gold 413
Red 380
The second shot gives you the option of going for the green in two or laying-up in front of three large bunkers protecting the sloping green. The tee shot on this hole is guarded on the left by out-of-bounds the entire length of the hole, along with a set of three fairways bunkers.
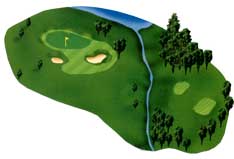
Par 3
Blue 143
White 100
Gold 85
Red 75
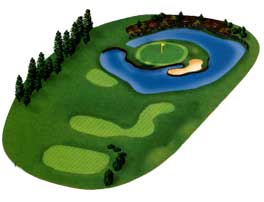
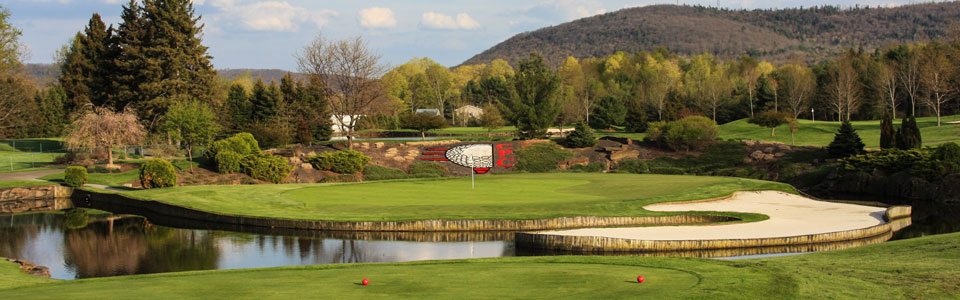
The signature hole at the CPC is this island par 3. This short iron tee shot is played to a beautifully landscaped and bunkered island green. There is no place to miss this tee shot. The wind direction can make this shot anything from a wedge to a mid-iron.
Par 4
Blue 395
White 362
Gold 314
Red 256
The tee shot is played to an elevated fairway protected by woods on both sides. A tee shot to the crest of the hill leaves you an approach shot to a very deep but narrow green protected by a pond on the right.
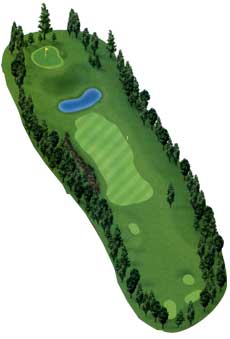
Par 4
Blue 395
White 333
Gold 288
Red 258
This downhill hole requires a tee shot avoiding woods on both sides and large fairway bunkers on both sides. The approach is a medium-to-short iron to a sloping green with some tough pin placements.
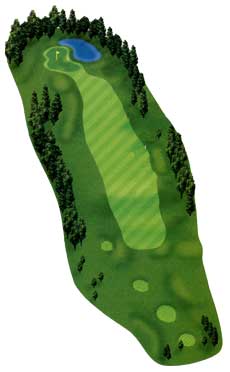
Par 3
Blue 170
White 128
Gold 103
Red 89
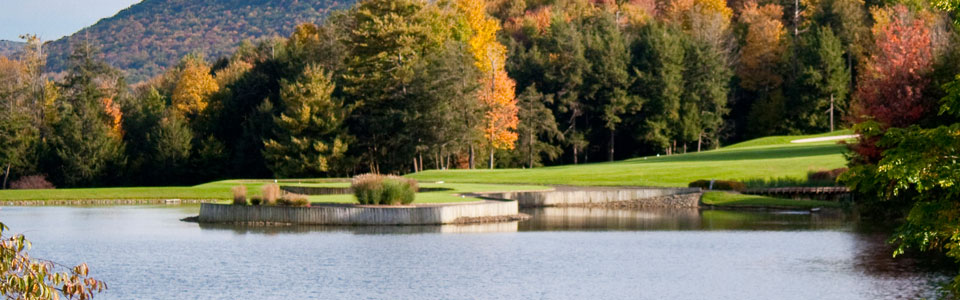
A beautiful par 3 playing entirely over water. Missing the green long leaves a difficult pitch shot so accuracy is a must.
Par 5
Blue 463
White 450
Gold 396
Red 360
\
This hole plays completely uphill and has the largest elevation change of any hole on course. Avoiding out-of-bounds on the left and bunkers on the right will allow you to go for the green in two or lay-up just short of the green.
Par 4
Blue 381
White 367
Gold 356
Red 265
This is a blind tee shot to a fairway protected on the left by a steep cliff, and on the right by a steep bank. The approach shot is played over a pond to a very deep green where judging the pin placement can be difficult.
Par 4
Blue 363
White 340
Gold 302
Red 205
The #1 handicap hole is a dogleg left requiring a tee shot from an elevated tee avoiding out-of-bounds left and trouble right. The approach is played to a very elevated green and usually requires one or two extra clubs.
Par 4
Blue 442
White 402
Gold 352
Red 325
A dogleg right plays downhill all the way and the tee shot must get past the woods on the right, leaving a short-to-mid iron to this green which is well below the fairway.
Par 5
Blue 546
White 518
Gold 478
Red 461
This dogleg right tee shot played from a very elevated tee to a fairway protected on the right by large trees and on the left by a creek and fairway bunkers make the decision of going for the green a difficult one. If you lay-up, you are left with a short iron shot.